
Understanding Continuity and Why It Matters
Before learning how to use a meter to test continuity, it helps to understand what continuity actually means. In simple terms, continuity refers to a complete electrical path between two points. When there’s continuity, current can flow freely through a wire, switch, fuse, or circuit component. When there’s no continuity, the path is broken, which usually indicates a problem such as a damaged wire, a blown fuse, or a faulty switch. Testing continuity is one of the most basic yet essential steps in diagnosing electrical issues. It helps confirm whether electricity can flow as intended, saving time and effort when troubleshooting.
The Role of a Multimeter in Continuity Testing
A multimeter is a versatile tool that measures voltage, current, resistance, and continuity. It can be digital or analog, but digital multimeters are far more common today because they’re easier to read and more accurate. When you’re figuring out how to use a meter to test continuity, you’re really learning how to use the multimeter’s built-in continuity function. This function helps you verify electrical connections quickly. Most multimeters have a dedicated continuity symbol that looks like a sound wave or a diode symbol. When this setting is selected, the device emits a tone when continuity exists, making it easy to confirm a complete path without constantly checking the display.
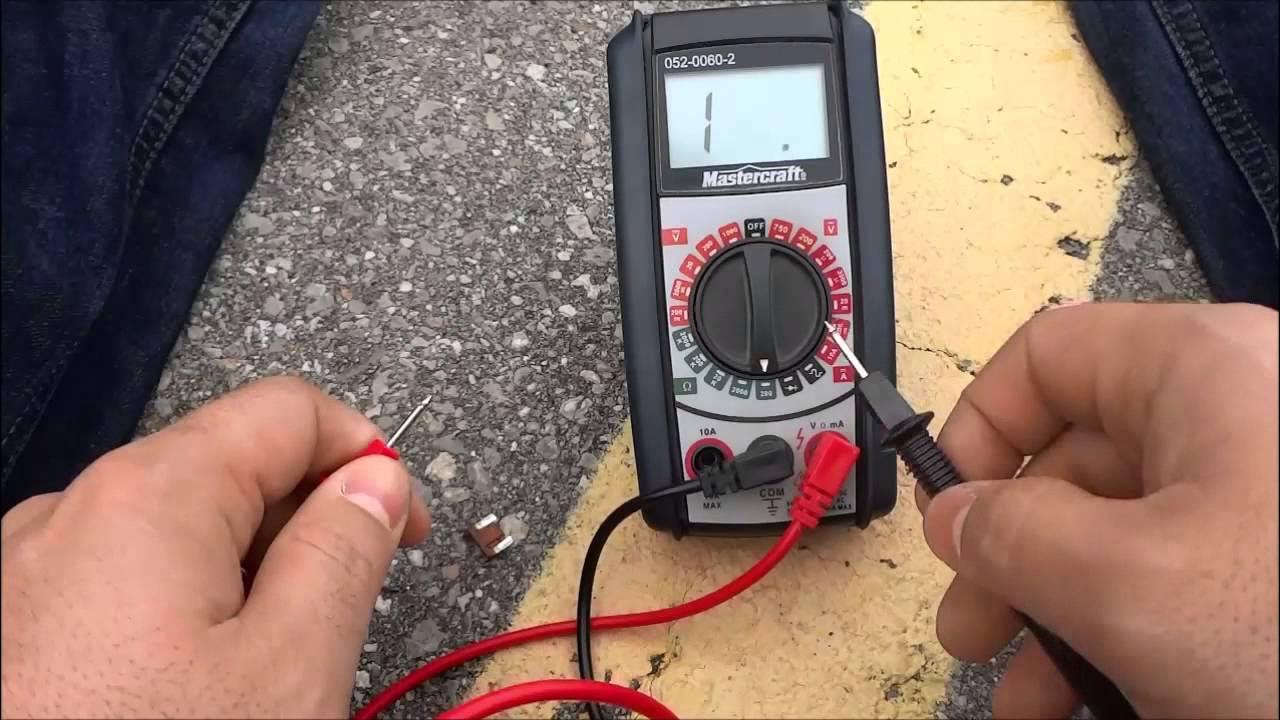
Preparing the Multimeter for the Test
Before performing any continuity test, make sure the power to the circuit is turned off. Testing continuity on a live circuit can damage the meter or cause inaccurate readings. Once you’ve confirmed it’s safe, insert the black probe into the common (COM) port and the red probe into the port labeled with the Ohm (Ω) or continuity symbol. Then, turn the multimeter’s dial to the continuity mode. If your meter doesn’t have a specific continuity setting, you can use the resistance (Ω) setting instead. When in continuity mode, most meters will beep when the test leads are connected to a closed circuit.
Performing the Continuity Test
Now that your meter is ready, you can begin testing. To understand how to use a meter to test continuity properly, follow these steps carefully. Touch one probe to one end of the component or wire you want to test, and touch the other probe to the opposite end. If the meter beeps or shows a reading close to zero ohms, it means the circuit is continuous and electricity can flow through it. If you don’t hear a beep or if the reading shows “OL” (open loop), there’s a break in the circuit. This could be caused by a broken wire, a corroded connector, or an internal fault in the component.
Common Applications for Continuity Testing
Testing continuity is useful in many everyday electrical and electronic tasks. Electricians use it to verify wiring connections in homes or buildings. Automotive technicians use it to check fuses, relays, and switches in vehicles. Homeowners can use it to identify broken appliance cords or malfunctioning light switches. Essentially, anyone working with circuits can benefit from knowing how to use a meter to test continuity. It’s a simple skill that can prevent bigger issues by identifying faults early.
Troubleshooting Tips for Accurate Results
To get accurate readings, always make sure your meter’s probes are clean and in good condition. Dirty or worn probe tips can interfere with contact and produce false readings. Also, be aware that if you’re testing components that have built-in resistance, such as resistors or coils, the meter might not beep even though continuity exists. In those cases, use the resistance measurement instead of the continuity function. When testing wires or cables, move the probes along the length of the wire if you suspect an intermittent fault. This helps locate areas where the connection might be weak or broken.
Safety Considerations When Using a Meter
Safety should always come first when working with electricity. Even though continuity testing is done on de-energized circuits, it’s still important to double-check that the power is off. Avoid touching exposed metal parts of the probes during testing, and handle the multimeter with care. Using a quality meter with proper insulation and safety ratings also helps prevent accidents.
Conclusion
Learning how to use a meter to test continuity is a fundamental skill that anyone dealing with electrical systems should know. It’s a quick and reliable way to confirm whether a connection is intact or broken. By understanding the principles behind continuity, preparing your meter correctly, and following safe testing steps, you can troubleshoot circuits efficiently and confidently. Whether you’re fixing household wiring, maintaining automotive systems, or working on electronic devices, mastering continuity testing is one of the most practical and valuable skills you can develop.
Follow Us On Twitter For More Information: